Cuisinart appliances are renowned for their quality and reliability in modern kitchens. However, to fully utilize the potential of a Cuisinart air fryer, it’s essential to understand how to set the time accurately for various cooking tasks. Setting the time on your Cuisinart Air Fryer is a straightforward process that ensures your cooking experience is both convenient and efficient. Whether you’re a beginner or a seasoned user, having the right time on your appliance helps you keep track of how long your food is cooking.
In this article, I’ll explain how to set time on Cuisinart Air Fryer and provide a step-by-step process for changing the clock settings. I’ll make it easy for you to navigate the settings and ensure the time is correct.
Remember, the steps might be a little different depending on which model of Cuisinart Air Fryer you have. But I’ll give you a general idea that should work for most models. And if you get stuck, don’t forget to check the user manual that came with your Air Fryer. Whether you’ve just bought a new Cuisinart Air Fryer or need to fix the time on your old one, follow the steps in this article to get it done easily.
Get ready to impress with your cooking skills by making sure your Cuisinart Air Fryer has the correct time! So, let’s get started on this simple but necessary task! It only takes a few minutes to do.
Understanding Your Cuisinart Air Fryer
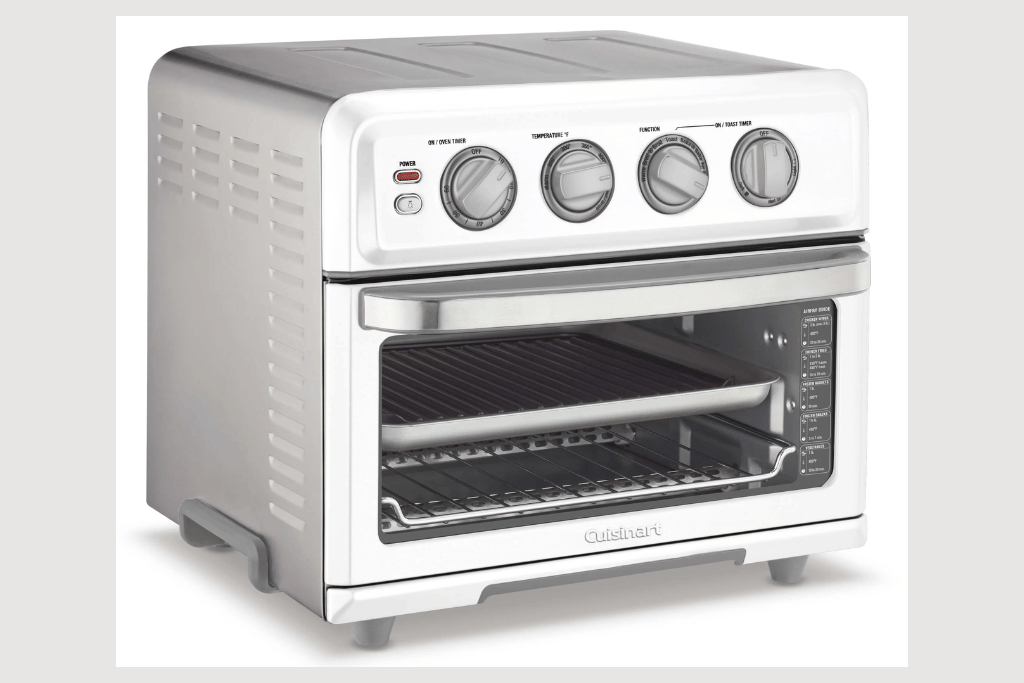
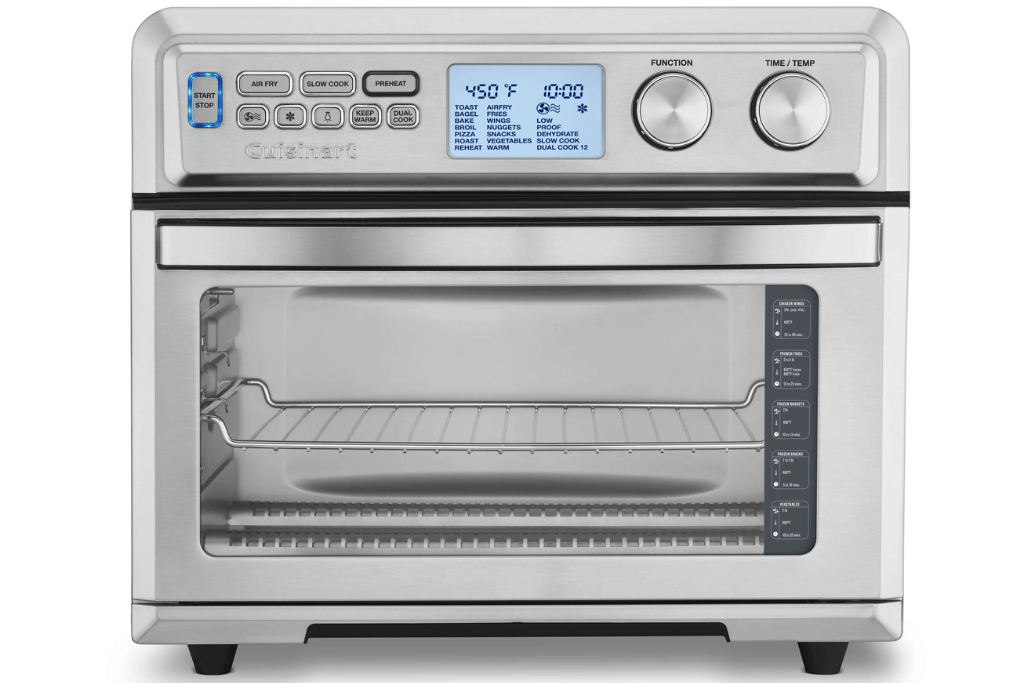
First, let’s talk about the buttons on your air fryer. There’s a power button to turn it on and off. Then, there’s a button to choose what you want to cook, like fries or chicken. After that, there are buttons to adjust the time and temperature. You’ll need these to cook your food just right. Once you’ve picked what you’re cooking and set the time and temperature, you can press the start button to begin cooking. The screen will show you how long your food has left to cook. Understanding these buttons will help you use your air fryer easily.
How to Set Time on Cuisinart Air Fryer
Before we begin exploring the detailed steps, here are some key points to keep in mind while setting the time on your Cuisinart Air Fryer:
- Familiarize yourself with the control panel: Take a moment to locate the buttons and display screen on your Cuisinart Air Fryer. Understanding the layout will make navigation easier.
- Ensure the Air Fryer is plugged in: Before attempting to set the time, ensure that your Cuisinart Air Fryer is properly plugged into a power source.
- Refer to the user manual: If you encounter any difficulties during the process, refer to the user manual provided with your Cuisinart Air Fryer. It contains valuable information and troubleshooting tips.
Step 1: Powering on the Cuisinart Air Fryer
To begin setting the time on your Cuisinart Air Fryer, you first need to power on the appliance. Follow these simple steps:
- Locate the power button: Depending on the model of your Cuisinart Air Fryer, the power button may be located on the control panel or the side of the appliance.
- Press the power button: Once you have located the power button, press it to turn on the Cuisinart Air Fryer. You should see the display screen light up, indicating that the appliance is powered on.
- Wait for the Air Fryer to initialize: After powering on the Cuisinart Air Fryer, wait for a few moments as the appliance initializes. You may hear a beep or see a message on the display screen indicating that the Air Fryer is ready for use.
Step 2: Accessing the Time Setting Menu
Once the Cuisinart Air Fryer is powered on, you can easily access the time setting menu. Follow these steps:
- Navigate to the settings menu: Use the navigation buttons on the control panel to access the settings menu. This menu may be labeled as “Settings,” “Menu,” or “Options,” depending on your Air Fryer model.
- Locate the time setting option: Within the settings menu, look for the option to set the time. This option is typically labeled as “Clock,” “Time,” or “Timer.”
- Select the time setting option: Once you have located the time setting option, press the corresponding button to select it. This will allow you to adjust the current time on your Cuisinart Air Fryer.
Step 3: Adjusting the Current Time
With the time setting menu accessed, it’s time to adjust the current time on your Cuisinart Air Fryer. Follow these straightforward steps:
- Use the navigation buttons: Within the time setting menu, use the navigation buttons to navigate to the option that allows you to adjust the time. This option is often labeled as “Set Time” or “Adjust Time.”
- Select the adjust time option: Once you have located the option to adjust the time, press the corresponding button to select it. This will enable you to change the current time displayed on your Cuisinart Air Fryer.
- Set the correct time: Use the arrow buttons or numeric keypad on the control panel to input the correct time. Ensure that you set the hour, minutes, and, if applicable, the AM or PM designation accurately.
- Confirm the time adjustment: After setting the correct time, press the “OK” or “Set” button on the control panel to confirm the time adjustment. You should see the updated time displayed on the screen.
Step 4: Saving the New Time
Once you have adjusted the current time on your Cuisinart Air Fryer, it’s important to save the changes to ensure they are retained. Follow these simple steps to save the new time:
- Locate the save or confirm button: After adjusting the time, look for the option to save or confirm the changes. This button may be labeled as “Save,” “Confirm,” or “Apply.”
- Press the save button: Once you have located the save button, press it to save the new time settings. You should see a confirmation message or indicator on the display screen indicating that the changes have been saved successfully.
Step 5: Verifying the Time Change

After saving the new time settings on your Cuisinart Air Fryer, it’s essential to verify that the time change has been applied correctly. Follow these final steps to ensure the time is set accurately:
- Check the display screen: Take a moment to verify that the updated time is displayed correctly on the Cuisinart Air Fryer’s screen. The hour, minutes, and AM/PM designation should reflect the changes you made.
- Wait for synchronization: In some cases, the Cuisinart Air Fryer may take a few moments to synchronize the updated time across all functions. Allow the appliance some time to complete this process.
- Double-check accuracy: Once the time synchronization is complete, double-check the displayed time to ensure its accuracy. Compare it with an external clock or watch to confirm.
By following these steps, you can successfully adjust the time on your Cuisinart Air Fryer and ensure that it reflects the correct time for your cooking needs.
Tips For Perfect Timing And Results
Setting the time on your Cuisinart air fryer isn’t just about punching in numbers. Here are some tips to help you get the most out of your cooking experience:
- Preheating Matters: Just like with an oven, preheating your air fryer can make a big difference. It helps your food cook evenly and prevents it from sticking to the air fryer basket. Set your air fryer to the desired temperature and let it preheat for a few minutes before adding your food.
- Adjust for Different Ingredients: Whether you’re cooking frozen fries or fresh vegetables, the cooking time may vary. Frozen foods usually need a bit more time to cook, so adjust the cooking time accordingly. Experiment with different settings to find the perfect balance for your favorite dishes.
- Check for Doneness: It’s essential to check your food periodically as it cooks. Use a kitchen thermometer to ensure the meat is cooked to the proper internal temperature, and give vegetables a poke to see if they’re tender. Adjust the cooking time if needed to achieve your desired level of doneness.
- Shake or Flip: For foods like french fries or chicken wings, shaking the basket or flipping the food halfway through cooking can help ensure even browning. This simple step can make a big difference in the final result.
Troubleshooting Common Issues

Even with the best intentions, sometimes things don’t go as planned. Here are some common issues you might encounter when setting the time on your Cuisinart air fryer and how to troubleshoot them:
- Time Not Displaying Correctly: If the time isn’t showing up on the display, double-check that the air fryer is plugged in properly and turned on. If everything looks good but the display is still blank, there may be an issue with the unit that requires professional attention. Contact Cuisinart customer support for assistance.
- Food Not Cooking Evenly: Uneven cooking can happen if the food isn’t arranged evenly in the basket or if the air fryer is overcrowded. Make sure to arrange food in a single layer for the best results, and avoid overcrowding the basket. You may also need to adjust the cooking time or temperature to achieve even cooking.
- Food Sticking to the Basket: If your food is sticking to the basket, it may be due to insufficient preheating or not using enough oil. Try preheating the air fryer for a few minutes before adding your food, and lightly coat the basket with oil or cooking spray to prevent sticking.
How to Change Clock on Cuisinart Air Fryer
Adjusting the clock on your Cuisinart Air Fryer is quite similar to setting the time. The clock feature on your Cuisinart Air Fryer plays an important role in ensuring accurate cooking durations and top-notch performance. Whether you’re making changes for daylight savings or simply correcting the time, modifying the clock on your Cuisinart Air Fryer is a simple process. Just follow these easy steps to guarantee that your appliance’s clock shows the correct time:
- Step 1: Power on Your Cuisinart Air Fryer: Begin by ensuring your Cuisinart Air Fryer is powered on. Locate the power button on the control panel and press it to turn on the appliance. Wait for the display screen to illuminate, indicating that the Air Fryer is ready for use.
- Step 2: Access the Clock Setting Menu: Navigate to the clock setting menu on your Cuisinart Air Fryer. Use the control panel buttons to access the settings menu, typically labeled as “Settings,” “Menu,” or “Options.” Within the settings menu, look for the option specifically designated for setting the clock.
- Step 3: Adjust the Clock: Once you’ve accessed the clock setting menu, it’s time to adjust the time displayed on your Cuisinart Air Fryer. Select the option to adjust the clock and utilize the control panel buttons or numeric keypad to input the correct time. Be sure to set the hour, minutes, and AM or PM designation accurately.
- Step 4: Save the New Clock Settings: After making the necessary adjustments, it’s crucial to save the new clock settings to ensure they are retained. Look for the save or confirm button on the control panel and press it to save the changes. You should receive a confirmation message or see an indicator on the display screen confirming that the new clock settings have been saved successfully.
- Step 5: Verify the Clock Change: Take a moment to verify that the clock change has been applied correctly. Check the display screen to ensure the updated time is displayed accurately. You can also compare the displayed time with an external clock or watch to confirm its accuracy.
Summary
Setting the time or changing the clock on your Cuisinart Air Fryer is super important for cooking your food just right. By following the easy steps I talked about, you can make sure the time or clock on your Air Fryer is set correctly.
When you have the right time or clock set on your Air Fryer, it helps you know exactly how long your food needs to cook. Whether you’re new to cooking or you’ve been doing it for a while, having the right time or clock on your Air Fryer makes cooking much easier.
Just remember to check your Air Fryer’s manual if you need more help with the specific steps for your model. Once you get the hang of it, you’ll be able to cook all sorts of delicious meals with your Cuisinart Air Fryer, knowing the timing is just right. Happy cooking!
Next in Line: More Articles to Explore
- How to Dehydrate Mangoes in Air Fryer: Easy Guide to Chewy Mango Snacks
- How to Clean Ninja Air Fryer Oven Heating Element: A Step-by-Step Guide
- How to Reset Gourmia Air Fryer | Troubleshooting Tips
- How To Clean Philips Air Fryer | Expert Maintenance Guide
- How to Defrost Meat in an Air Fryer: Quick & Easy Guide
FAQs (How To Set Time On Cuisinart Air Fryer)
Do I need any special tools to change the time on my Cuisinart Air Fryer?
No, you don’t need any special tools. You can adjust the time using the control panel buttons on your Cuisinart Air Fryer.
Will changing the time on my Cuisinart Air Fryer erase any saved settings or presets?
No, changing the time on your Cuisinart Air Fryer will not erase any saved settings or presets. It only updates the displayed time on the appliance.
How long does it take to change the time on my Cuisinart Air Fryer?
Changing the time on your Cuisinart Air Fryer is a quick process that typically takes just a few minutes to complete.
Can I use aluminum foil in my Cuisinart air fryer?
Yes, you can use aluminum foil in your Cuisinart air fryer, but make sure it doesn’t cover the entire basket to allow proper air circulation.
How do you cook with a Cuisinart air fryer?
Cooking with a Cuisinart air fryer involves placing your food in the basket, setting the temperature and time, and letting the appliance do the work.